
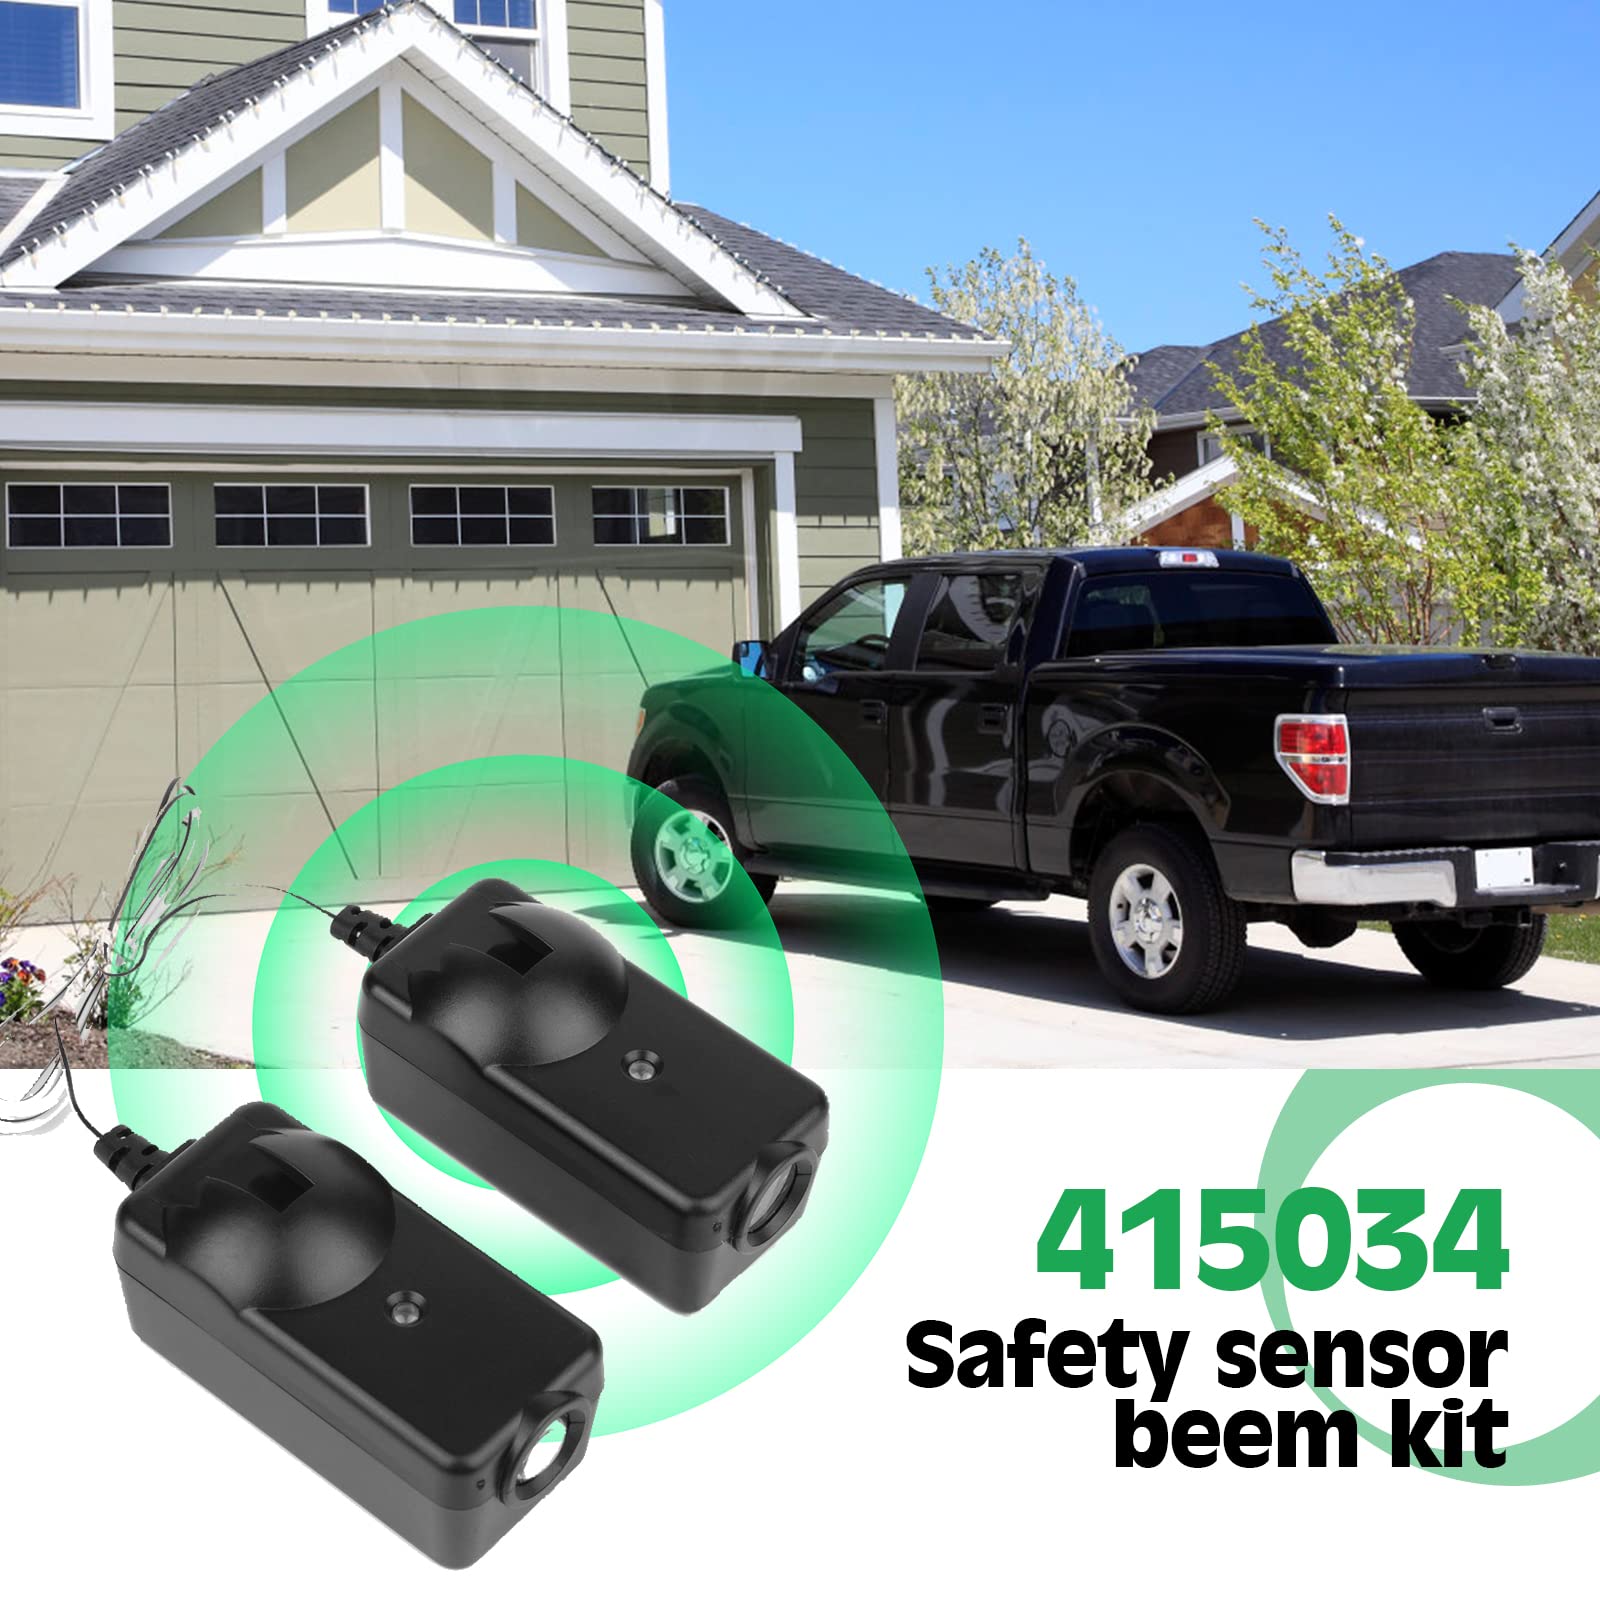


Safety Door Sensors Beam Eyes: Garage Door Opener 2 Pack Garage Sensor For Liftmaster Chamberlain 41A5034 Garage Sensor | Replacement Garage Door Sensors
Product Score
See total with duties & tax
Select location for accurate pricing, availability, and delivery estimates
Order today for delivery Sep 27 - Oct 1
Or by September 25 - 27 with expedited shipping
Delivery by: ![]()
Ships from: Snapklik.com
Warehouse location: New York
In Stock
Cancel for any reason at any time until your order shipped. Once your order has shipped, you may return your order. For details, please review our Returns and Cancellations policies. Special order items may not be eligible for cancellation.
Most items can be returned within 15 days of receipt for a refund of the product cost less return shipping. Shipping, duties, and taxes are not refundable. For details, please review our Returns and Cancellations policies.
Manufacturer warranties and service options may not be valid or available outside of the United States. To determine an item's service and warranty coverage in your country, please contact the manufacturer.
Product details
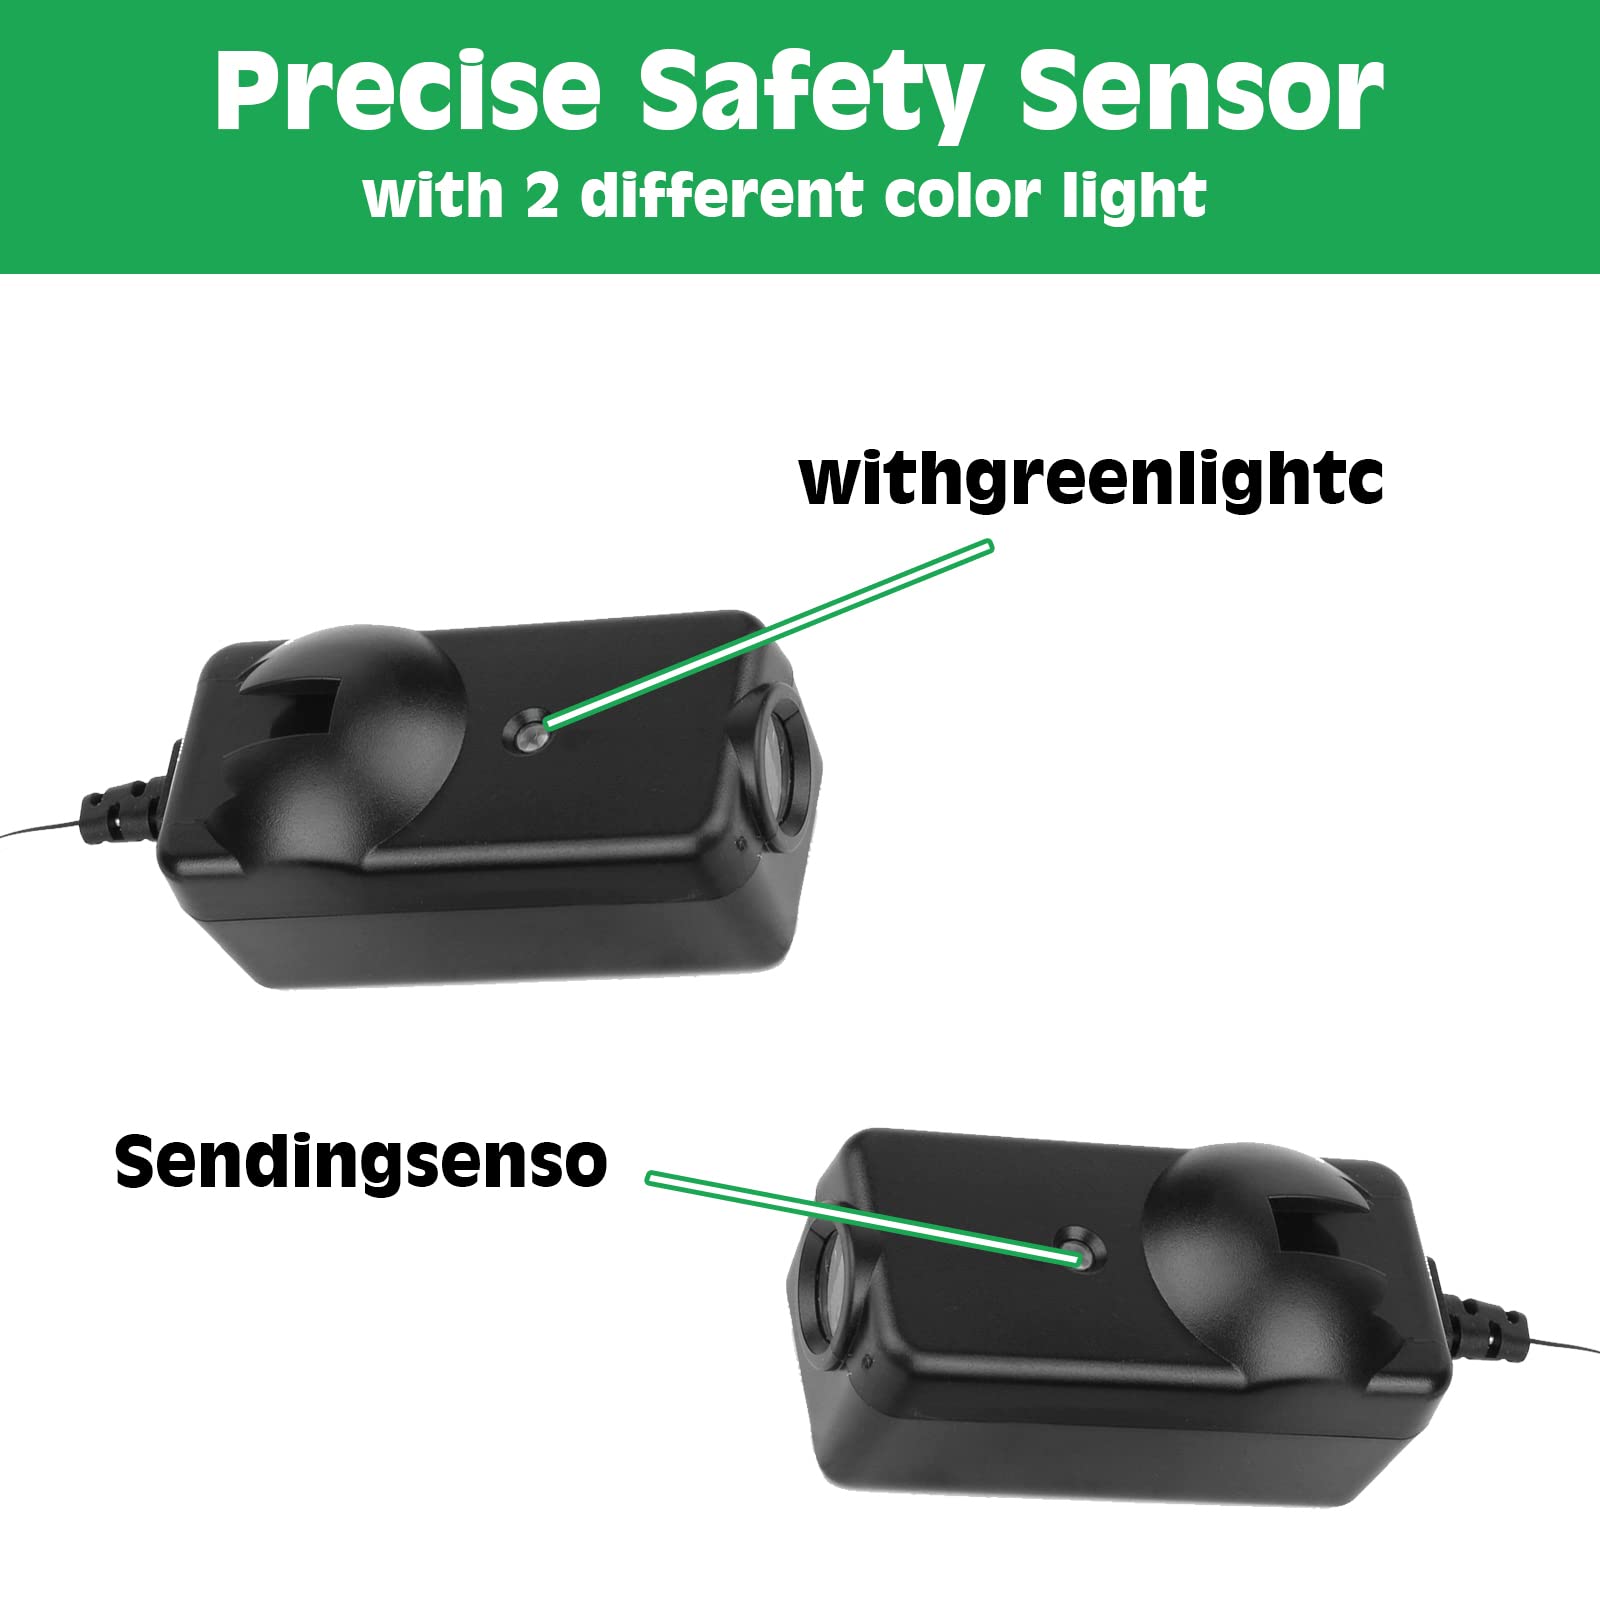
- 【Easy to Install】 You can refer to the manual to replace the original garage door sensors. When the sensor detects an obstacle, the yellow light sensor sends an invisible beam to the green light sensor, then the door will automatically stop closing and reverse..
- 【Note】Your garage door opener must be equipped with a safety sensor. If not, installing this accessory will not add the feature. Please make sure disconnect the power from door openers before installing..
- 【Applicable】This garage door sensors for 1997-Current Sears Chamberlain Craftsman Master Mechanic & Wayne Dalton, with safety sensor option..
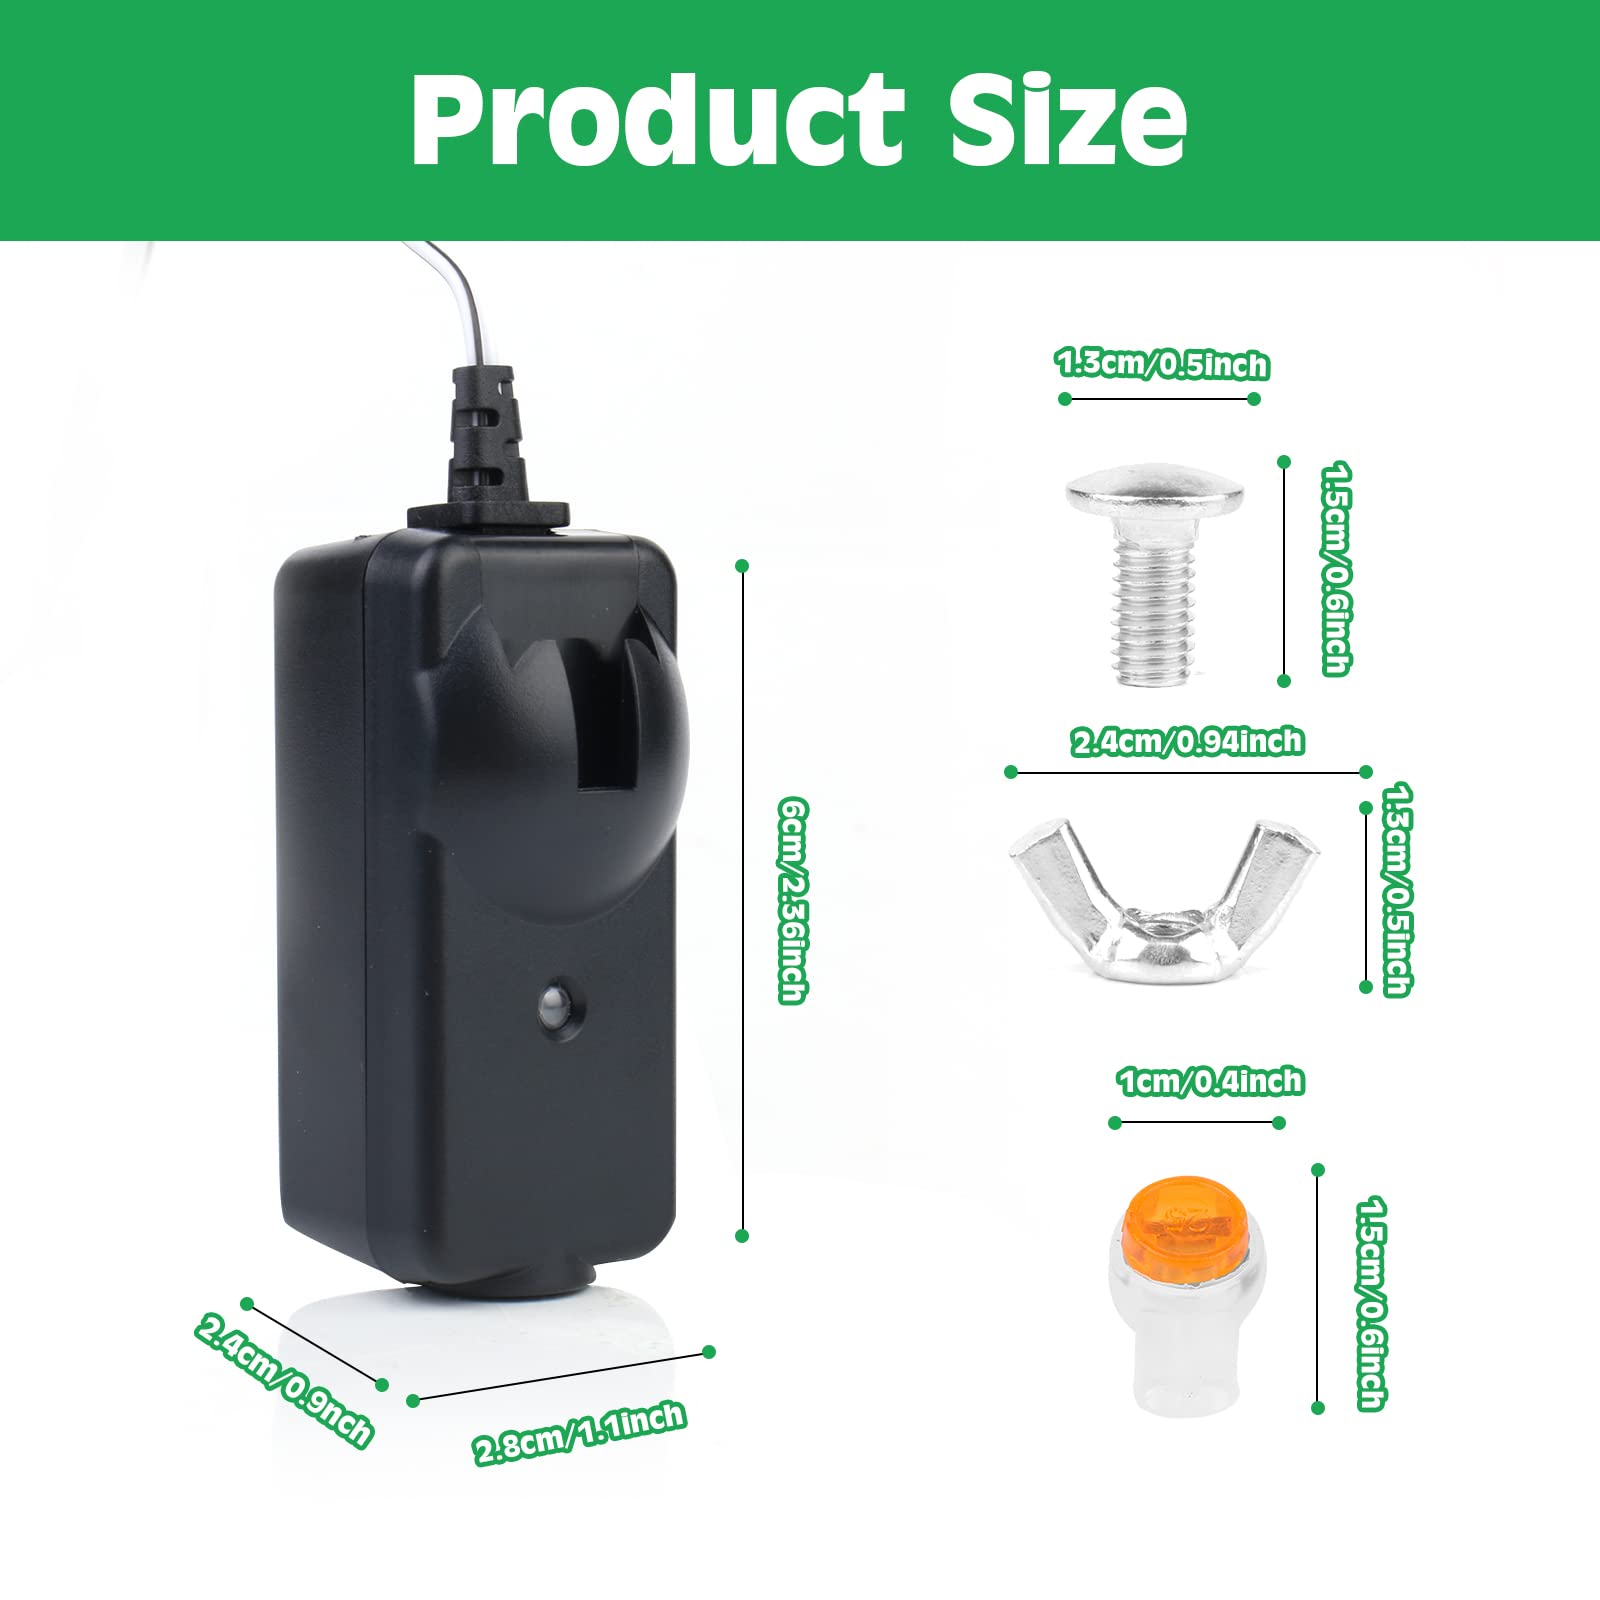
- 【Package】You will receive 2 craftsman garage door sensor (sending & receiving) with wires, 2 screws & wing nuts, 5 round head bolt and 1 user manual..
Product Information: Name: craftsman garage door opener parts Package Contents: 2 garage door sensor (sending & receiving) with wires 2 screws & wing nuts 5 round head bolt 1 user manual Install: OPTION A - DOOR TRACK INSTALLATION 1. Snap into place so that the garage door opener bracket is flush against the track. 2. Slide the carriage bolt into the slot on each sensor. 3. Insert the bolt through the hole in the sensor bracket and attach with the wing nut. The lenses on both sensors should point toward each other. Make sure the lens is not obstructed by the sensors bracket. OPTION B - WALL INSTALLATION lf additional clearance is needed an extension bracket(not provided) or wood blocks can be used.


Make sure each bracket has the same amount of clearance so they will align correctly 1. Position the craftsman garage door sensor bracket aginst the wall with the curved arms facing the door. Make sure there is enough clearance for the beam to be unobstructed. Mark holes. 2. 3. 4. Insert the bolt through the hole in the sensor bracket and attach with the wing nut. The lenses on both sensors should point toward each other. Make sure the lens is not obstructed by the sensor bracket. OPTION C - FLOOR INSTALLATION Use an extension bracket(not provided)or wood block to raise the sensor bracket if needed. 1.
Carefully measure the position of both craftsman garage door sensor brackets so they will be the same distance from the walland unobstructed. 2. Attach the sensor brackets to the floor using concrete anchors (not provided). 3. 4. Insert the bolt through the hole in the sensor bracketand attach with the wina nut. Make sure the lens is not obstructed by the sensor bracket. Note: If your garage door opener is not equipped with a security sensor, installing this accessory will not add that functionality. Please make sure disconnect the power from door openers before installing.
| Item dimensions | 10 x 10 x 4 cm |
| SKID | 0P384P274CJW5 |
| Manufacturer | HPX |
| Model | CKCGQ-00043 |